Images
A specific prompt is key to generating an image that closely matches your expectations. The more precise your description, the better the result will be. Think of details such as colours, objects, and environments. Rather than using a general term like ‘dog’, you could say ‘a brown labrador running through an autumn forest’. The more specific you are, the greater the chance that AI will create exactly what you have in mind.
Example
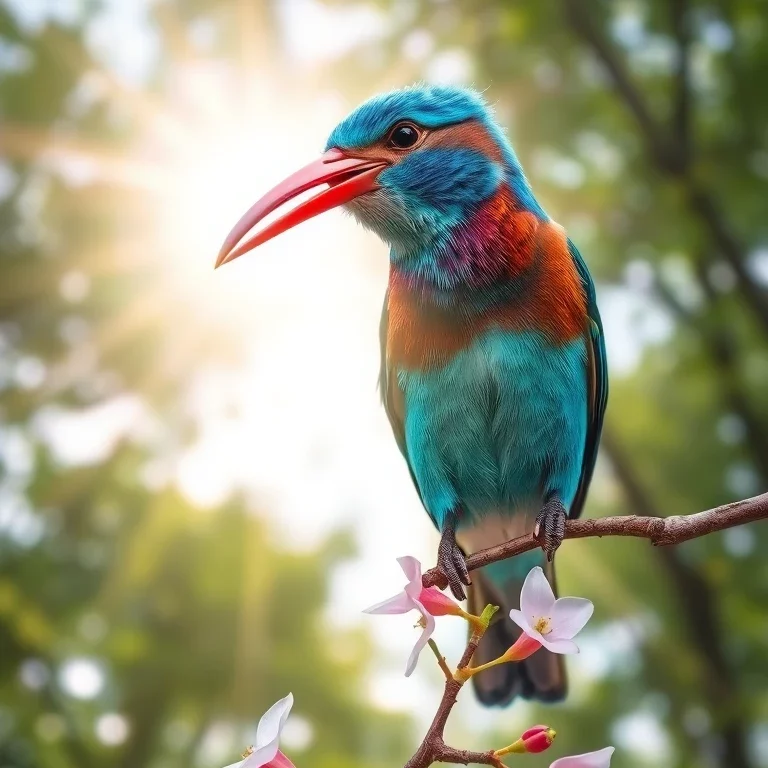
‘Create a realistic image of a blue bird with a red beak, perched on a blossoming branch in spring, with a blurred background of green trees and a sunny sky. Use layered colours and ensure a cheerful atmosphere.’
Start by describing which key objects you want to see in the image. This ensures that the AI prioritises those elements when generating the image. After that, add extra details to enrich the scene. Use adjectives to refine the objects further, for example, ‘a majestic oak’ rather than simply ‘a tree’. This approach draws focus to the right details so that they stand out more.
Example
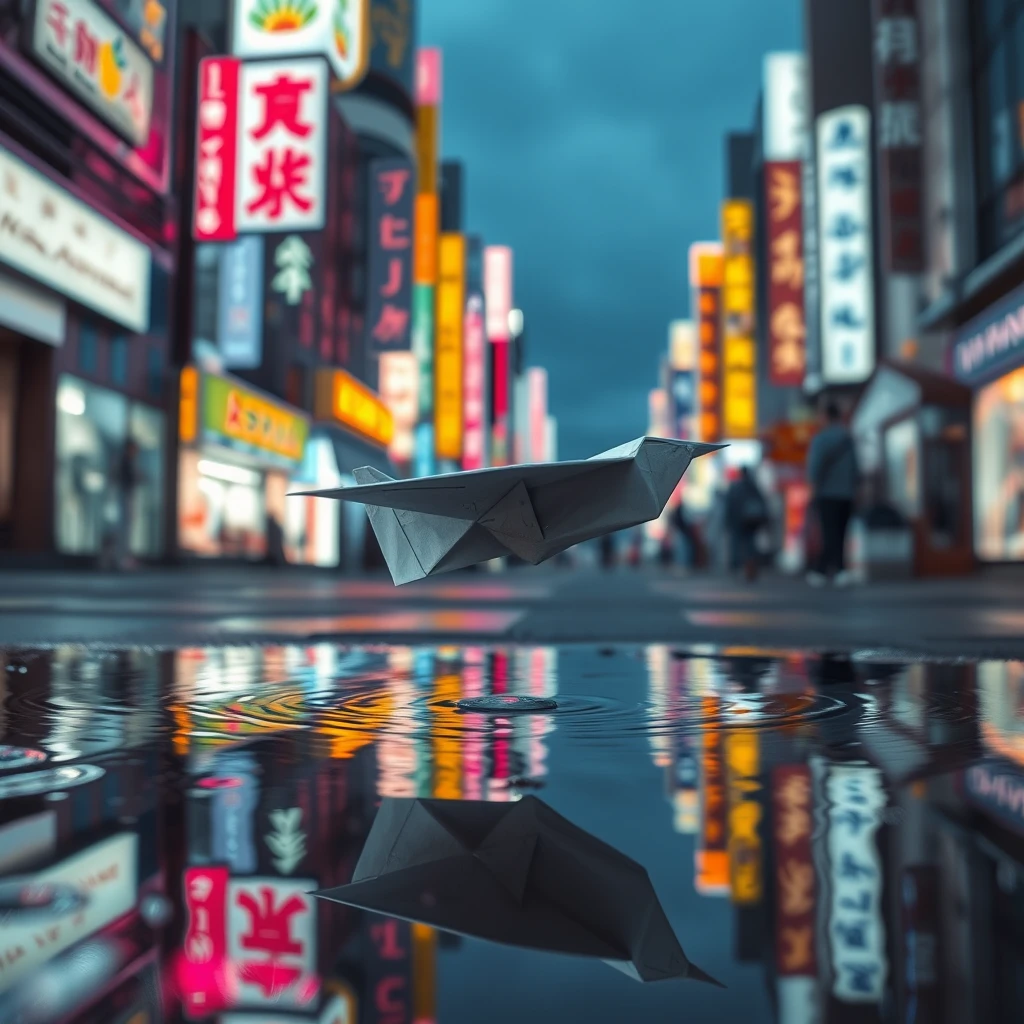
‘A delicate origami plane rests on a puddle, surrounded by vibrant pink and green neon signs from Tokyo. The lights are reflected in the background, blurred in Bokeh, with a shallow depth-of-field effect.’
When creating an image, it is important to clearly indicate the desired style and context. Do you want the image to be realistic and lifelike, or more cartoonish? Perhaps you are after an abstract, futuristic look or something in the style of Van Gogh? Also, think about the context. An image for social media may need to be more striking and playful, whereas one for a formal presentation might need a more refined look. By carefully selecting the appropriate style and context, you can ensure your image is not only beautiful but also perfectly suited to your purpose and audience.
Example
‘a small gnome sitting on the back of a cat, in the style of an animated film’

The composition of an image is all about arranging elements to create balance, focus, or a sense of movement. In AI-generated images, you can add depth by positioning certain objects in the foreground and background. You can also define their orientation, such as having a person looking to the left while an object in the background is facing the right. In addition, using colour contrasts can make specific parts of the image stand out more, while a balanced colour scheme can bring a sense of harmony. You can also opt for symmetry to create a calm, peaceful image, or choose asymmetry to add more energy and tension. The possibilities are endless. Whatever choices you make, they will guide the viewer’s attention and ensure the visual impact you are aiming for.
Example
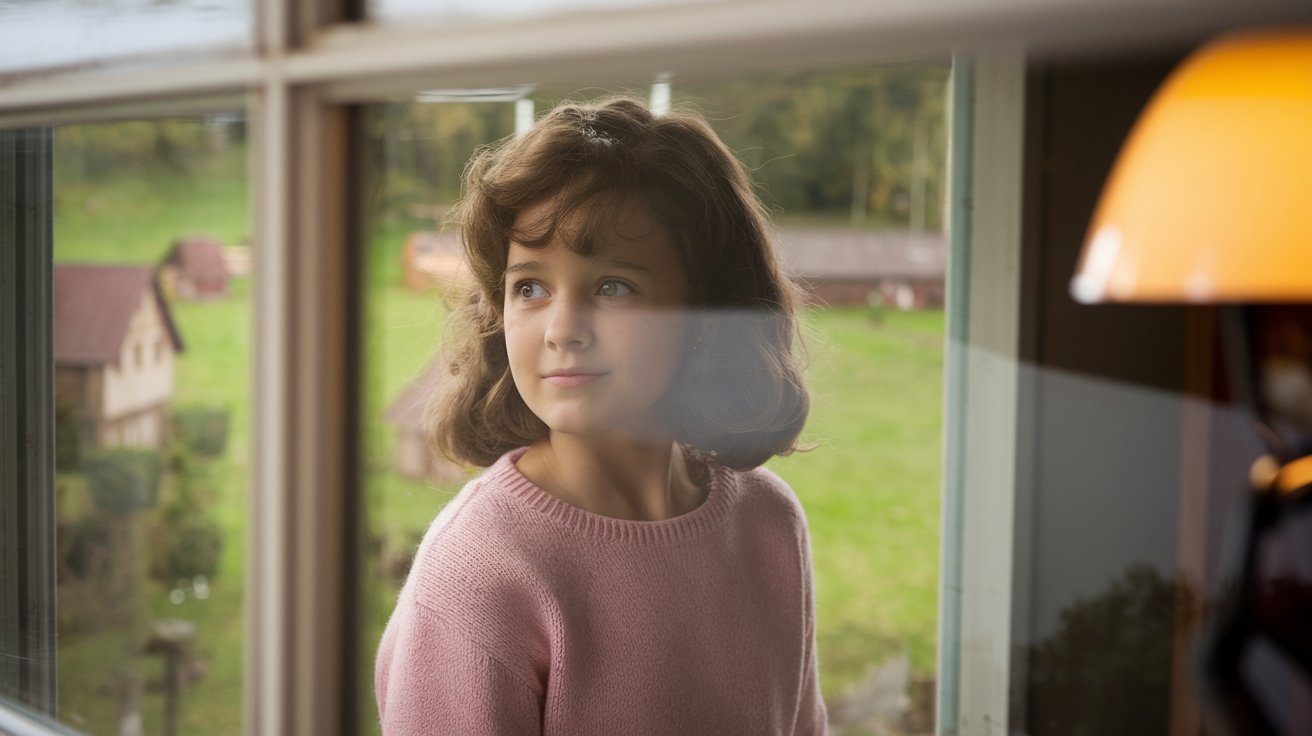
‘A girl gazes out of the window, photographed from the outside looking in. She stares into the distance at her cosy green village, reflected in the glass. In the background, a reading lamp sits in the right corner, styled like 80s cinema.’
The setting and environment of an image do not only determine the physical location but also the atmosphere the scene conveys. You could ask for an image set ‘in a medieval setting’, where castles and knights form the background, or ‘in a modern urban environment’, where skyscrapers and busy streets dominate the scene. By incorporating these elements into your prompt, AI can create an image that not only includes the right objects but also captures the specific mood of your scene.
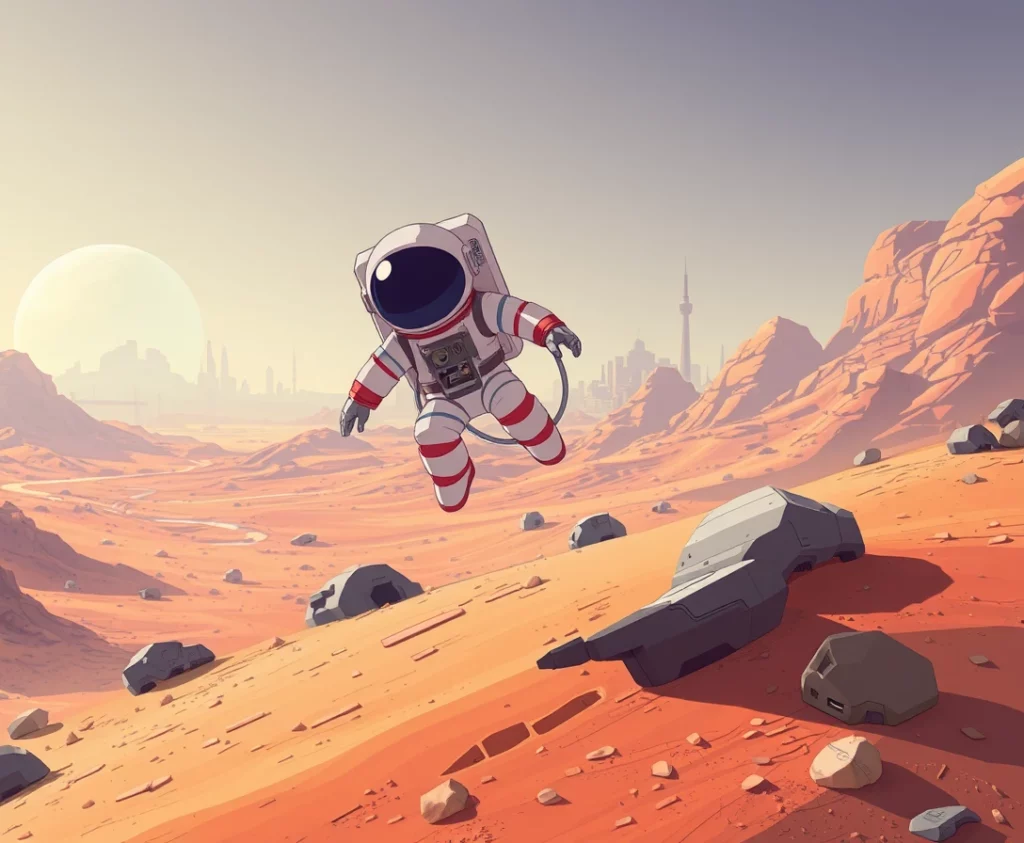
Example
‘a small astronaut bouncing through a peaceful Martian landscape, with a futuristic city in the distance’
The mood of an image determines what emotions and atmosphere the viewer experiences. When creating an image using AI, you can influence the mood by including specific words in your prompt. Consider terms like mysterious, cheerful, calming, or threatening to evoke the desired emotion. You can also play with elements like colours, lighting, and shadows to further enhance the mood. For example, soft, warm colours create a calm, inviting atmosphere, while harsh contrasts and darker tones lend to a more intense, dramatic feel. Even weather conditions such as mist, rain, or sunlight can greatly impact the mood. By carefully considering the atmosphere you want and clearly describing it in your prompt, AI helps you capture the exact emotion and mood in your image.
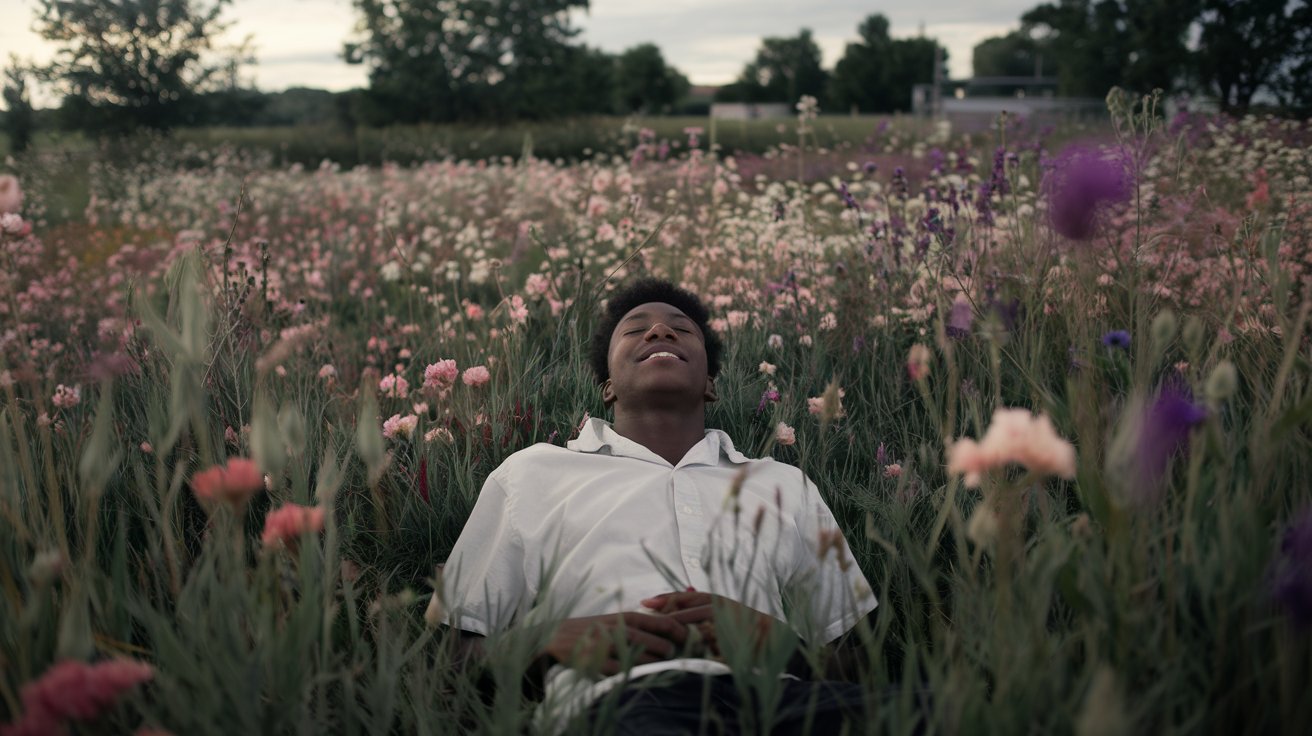
Example
‘a young man lying in a flower field, blissful, relaxed, peaceful, photographed from above’
The time of day and lighting conditions have a significant impact on the mood of your image. Think of a sunrise with soft, warm light casting a golden glow on everything, a misty morning creating a mysterious atmosphere, or a clear night full of stars, adding a magical and dreamy quality. Include these elements in your prompt. Want to create an image that feels fresh and energetic? Choose the early morning with plenty of light. Prefer a more intense, thrilling atmosphere? Generate an image at night, lit only by moonlight. By cleverly using time of day and lighting, you can set the perfect mood that fits what you want to portray. Try different combinations and discover what works best for your idea.
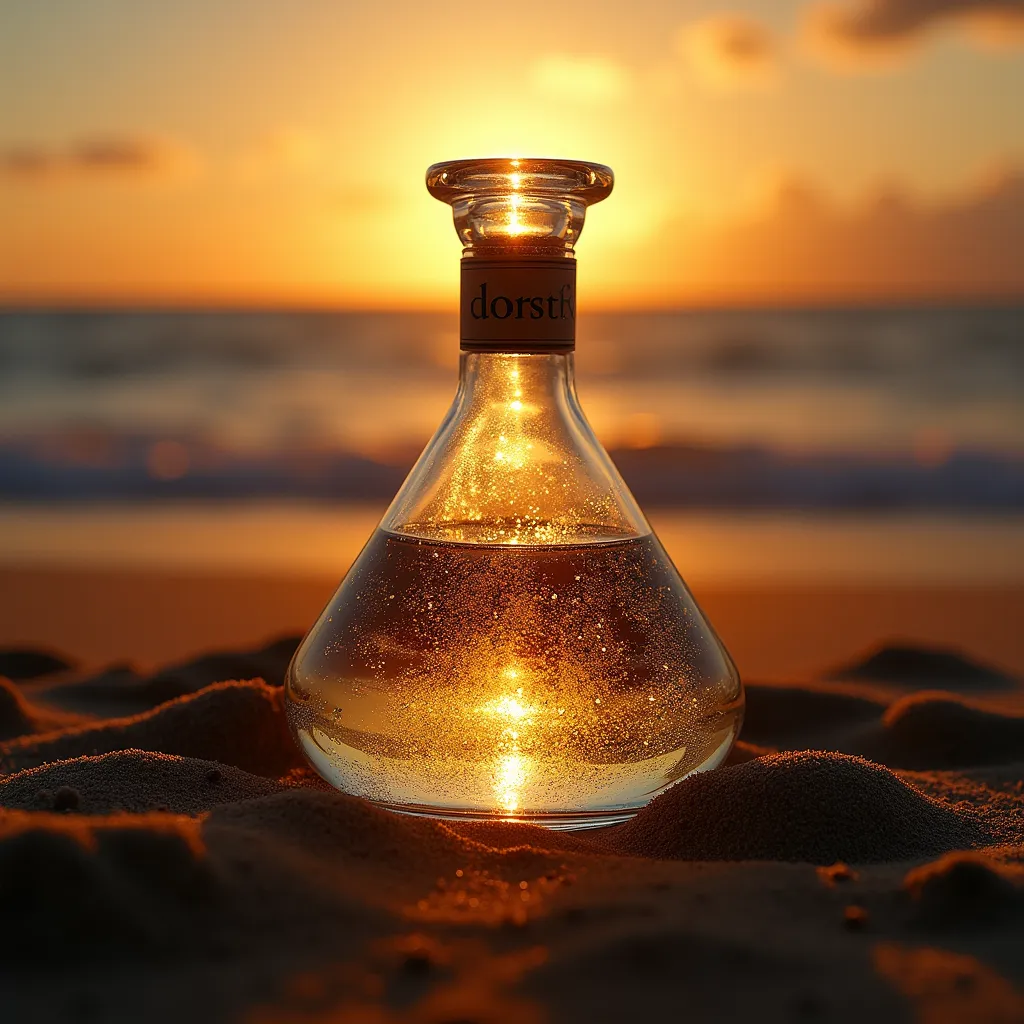
Example
‘A detailed photo of a magical crystal bottle, with the sunset shining through it and casting long shadows on the sand, detailed rim lighting. The bottle has a label with the word thirst.’
The medium you choose, directly influences how your image will look. Do you want a realistic photograph, a detailed pen drawing, or something resembling a classic oil painting? By clearly indicating this in your prompt, AI ensures your image gets the right look. A realistic photo gives a modern, lifelike appearance, perfect for situations where you want to depict something believable or recognisable. A pen drawing adds clean lines and black-and-white contrasts, offering an artistic, minimalist vibe. If you opt for an oil painting, you will get rich textures and deep colours reminiscent of classical artworks. Choosing the right medium helps you achieve the exact aesthetic you are aiming for, so do not forget to mention the medium in your prompt. It truly makes a difference.
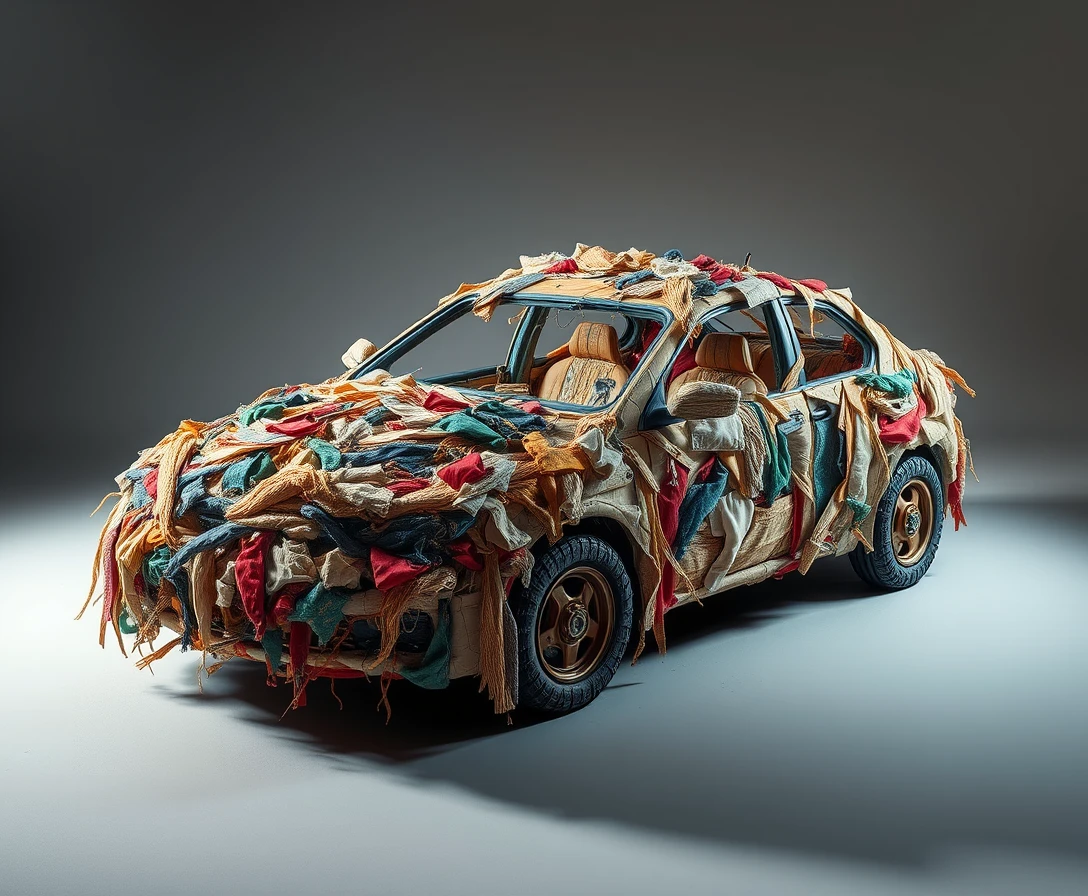
Example
‘a 3D render of a car made from pieces of fabric, three-point lighting on a tabletop’
The camera angle and perspective determine how an image comes across and which details stand out. When generating an image with AI, it is important to specify from which point of view the scene should be depicted. For instance, you might want a bird’s-eye view, where the camera looks from above to give an overview, or a close-up that zooms in on specific details to capture more emotion. A low-angle shot, where the camera looks up, can make objects appear larger and more impressive. A panoramic shot provides a wide view, ideal for landscapes. By including the camera angle in your prompt, you ensure that AI creates the image from the exact angle and focus you want.
Example
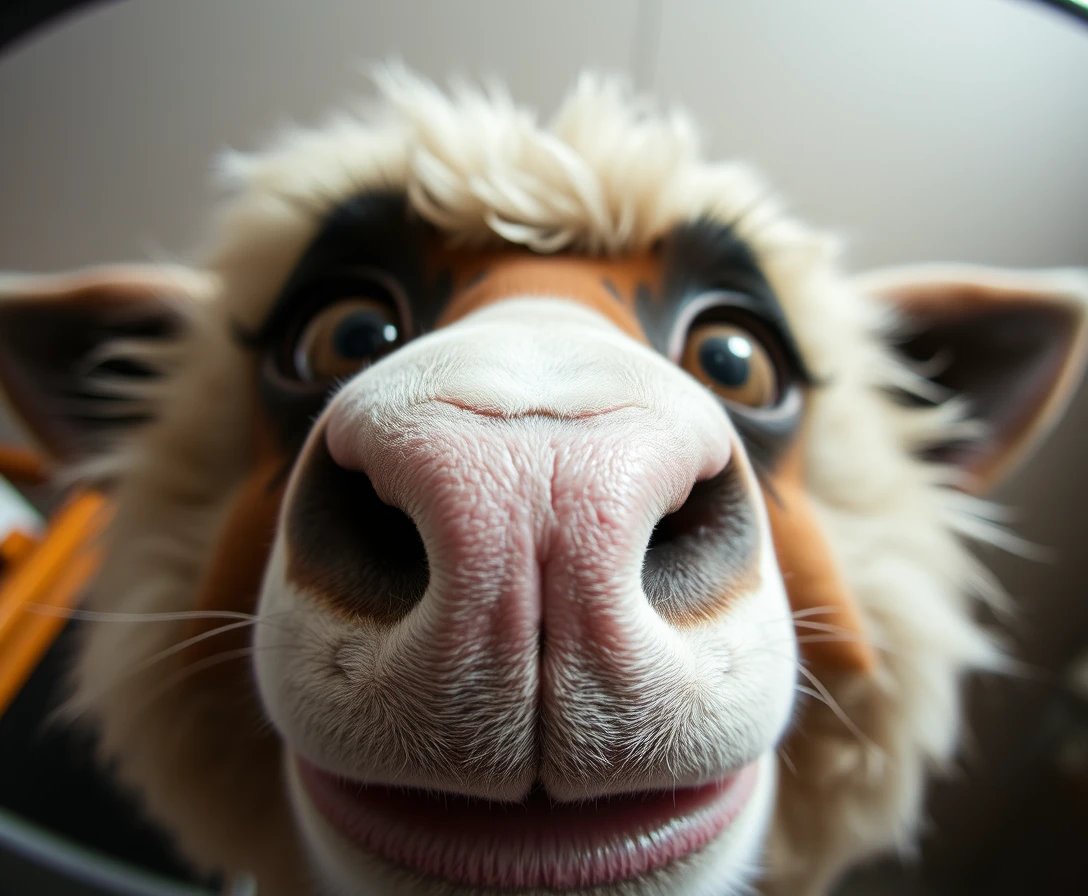
‘an extreme close-up of a funny character holding its nose near the camera, shot with a wide-angle lens from a low angle’
Generating images with AI is often a process of experimenting and refining. The first result may not be perfect, but this gives you the chance to adjust your prompt and clarify what you want. Is the image too dull? Ask for ‘more colours’ to create a more vibrant picture. Are the details not sharp enough? Add ‘stronger contrast’ to make them stand out more. By tweaking your prompt step by step, you will get closer and closer to the desired result. Try different adjustments and do not be afraid to experiment. Small changes in your instructions can make a big difference in how the image turns out.
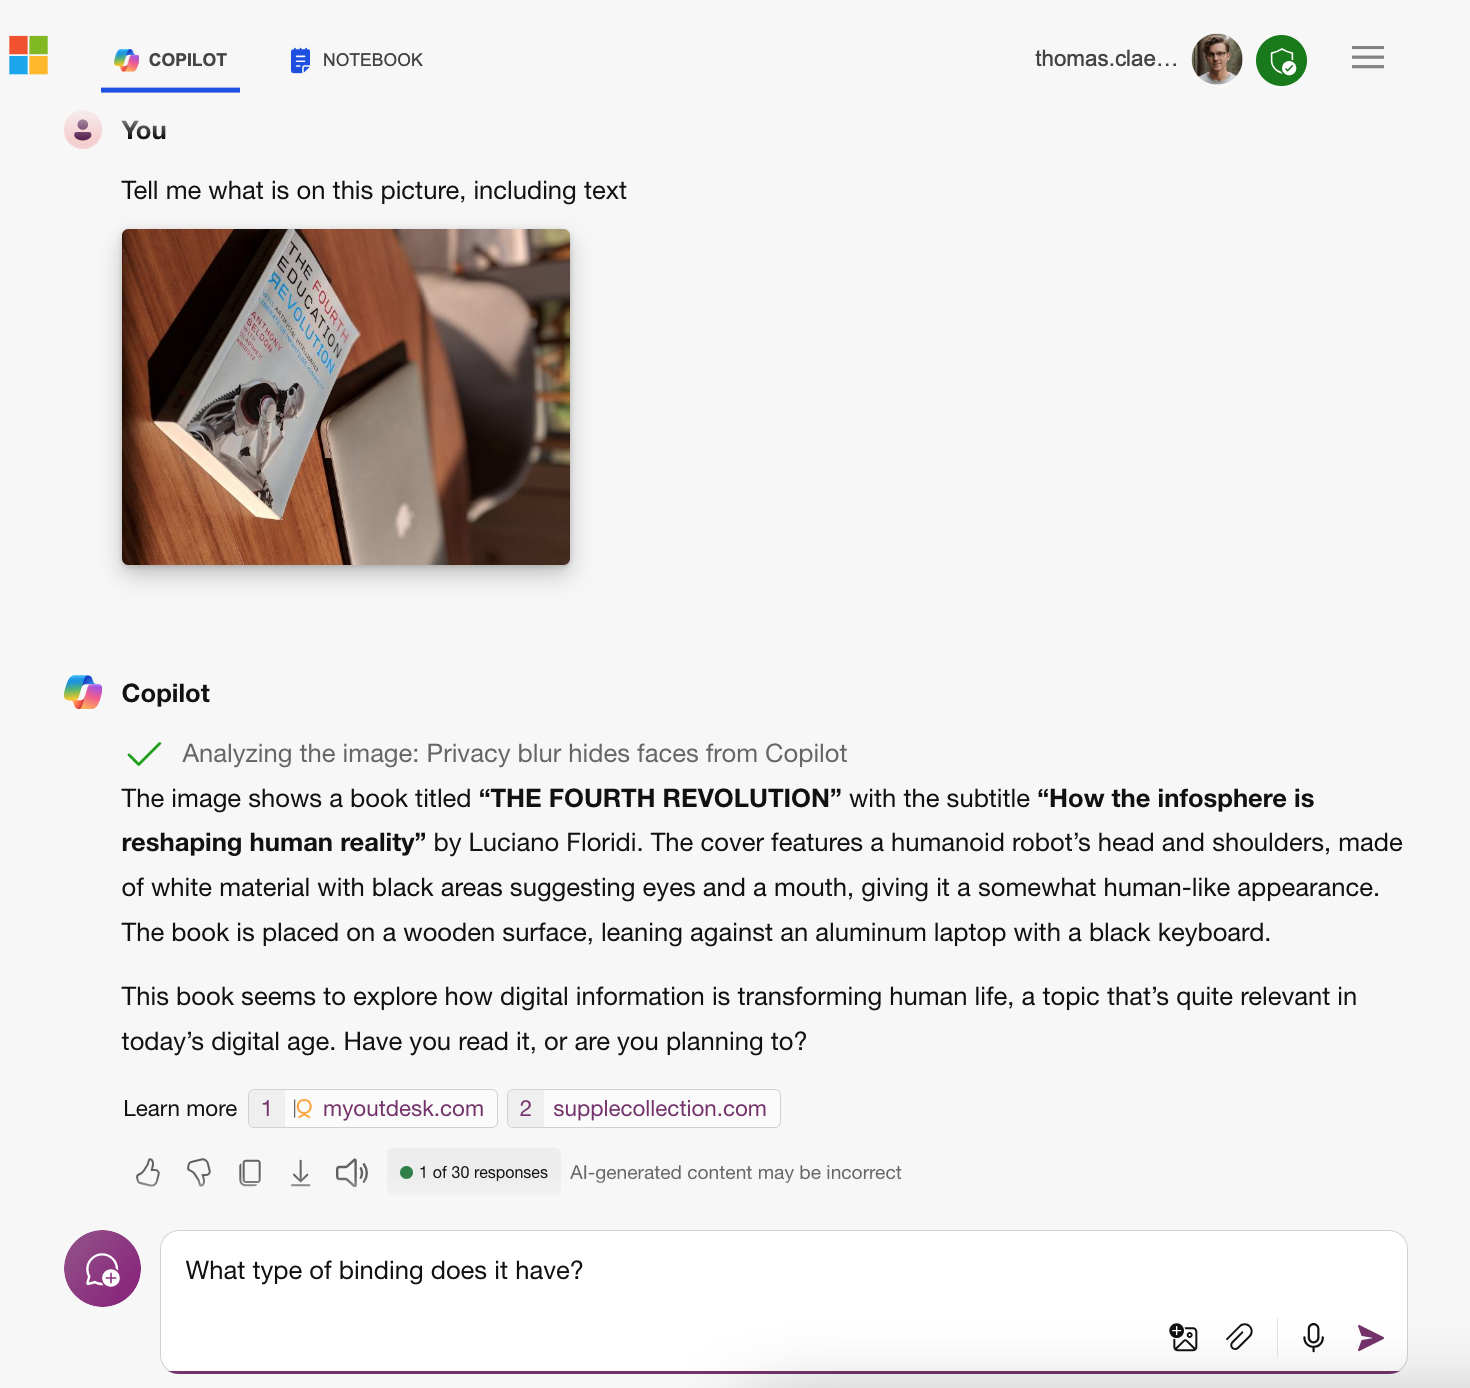
Upload an image with text and ask: ‘Tell me what is in the picture and what can you read?’ You can also easily generate ALT texts this way.
Share a photo with the AI chatbot and ask for additional information about the animal, object, location …